
Indulge in Maple Nut Fudge: Your Go-To No-Fuss Sweet Treat!
Introduction
There’s something truly magical about indulging in a sweet treat that transports you back to simpler times. I remember the first time I tasted Maple Nut Fudge; it was at my grandmother’s kitchen, the air filled with the rich scent of melting chocolate and buttery goodness. While flipping through an old recipe book, I stumbled upon “Maple Nut Fudge: A Sweet, No-Fuss Treat for Any Occasion,” a timeless recipe that has been passed down through generations. What makes this fudge extraordinary isn’t just the taste; it’s the memories tied to it—the laughter around the kitchen table, the joy on my family’s faces as they savored every bite.
This recipe stands out because it’s both incredibly simple and deliciously rich, making it a perfect handmade gift or a delightful treat for any gathering. Unlike store-bought versions, which can often lack depth and freshness, my Maple Nut Fudge is crafted with love and wholesome ingredients, ensuring nothing but pure satisfaction. In this post, I promise to guide you through every step, sharing tips, tricks, and a sprinkle of nostalgia along the way that will leave you eager to make this delectable treat yourself.
What Are Maple Nut Fudge Treats?
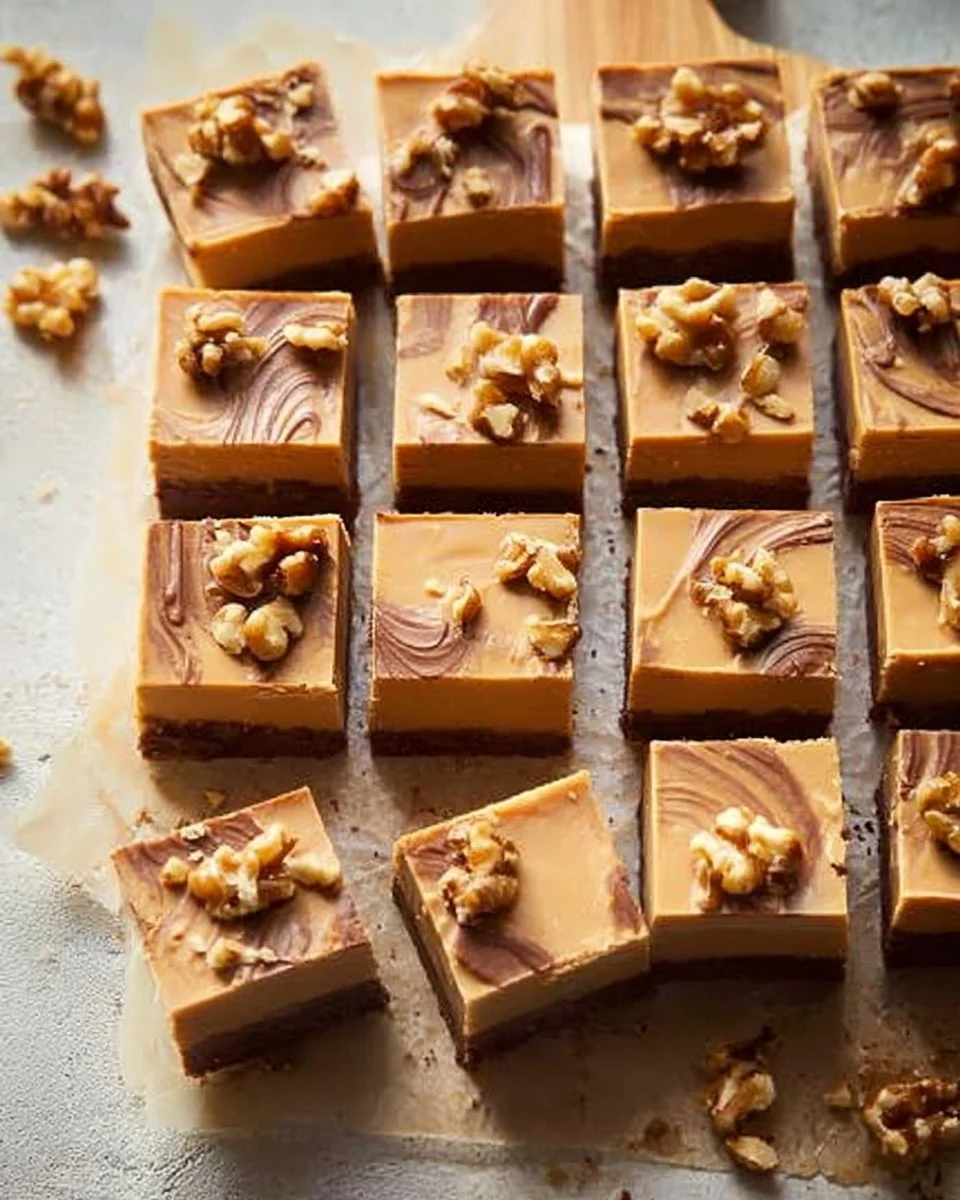
Maple Nut Fudge is a delightful confection that has its roots in traditional American desserts. This treat features a perfectly creamy base of white chocolate and sweetened condensed milk, kissed with the rich flavor of pure maple syrup. The addition of walnuts gives it that satisfying crunch, balancing the creamy texture with delightful contrast.
In terms of taste, think of a sweet, buttery indulgence accented with maple and the nutty undertones of walnuts—each bite melts in your mouth, leaving you craving just one more piece. What makes these fudge squares unique is just how easy they are to whip up—perfect for those who want to impress without investing an entire afternoon in the kitchen. Whether you’re celebrating a holiday, attending a potluck, or just wanting a sweet treat for the family, Maple Nut Fudge is the answer!
Why You’ll Love This Recipe
Quick and Easy: This Maple Nut Fudge recipe is incredibly straightforward, allowing you to mix, pour, and chill within just 30 minutes. Compare that to a day spent baking cakes or cookies, and you’ll appreciate how delightful the no-fuss approach is.
Cost-Effective: Why spend money on store-bought fudge when you can make a rich, gourmet version at home for a fraction of the price? With minimal ingredients, you’ll save both your wallet and your time.
Customize to Your Heart’s Content: Feel free to switch up the nuts or add a touch of sea salt on top for a salty-sweet contrast. The base recipe is so versatile that it can easily adapt to fit your taste preferences or dietary requirements.
Foil for Creativity: Unlike many baked goods, there’s no need for perfection here! Pour your fudge into the dish, and as long as it sets correctly, you’ll have scrumptious squares to enjoy. Plus, it’s a fantastic treat to involve kids in the kitchen—messy hands and all!
Connect with Tradition: When you make Maple Nut Fudge at home, you’re not just creating a dessert; you’re making memories. Share your fudge with friends, neighbors, or family, and watch as it brings smiles just like it did in my grandmother’s kitchen.
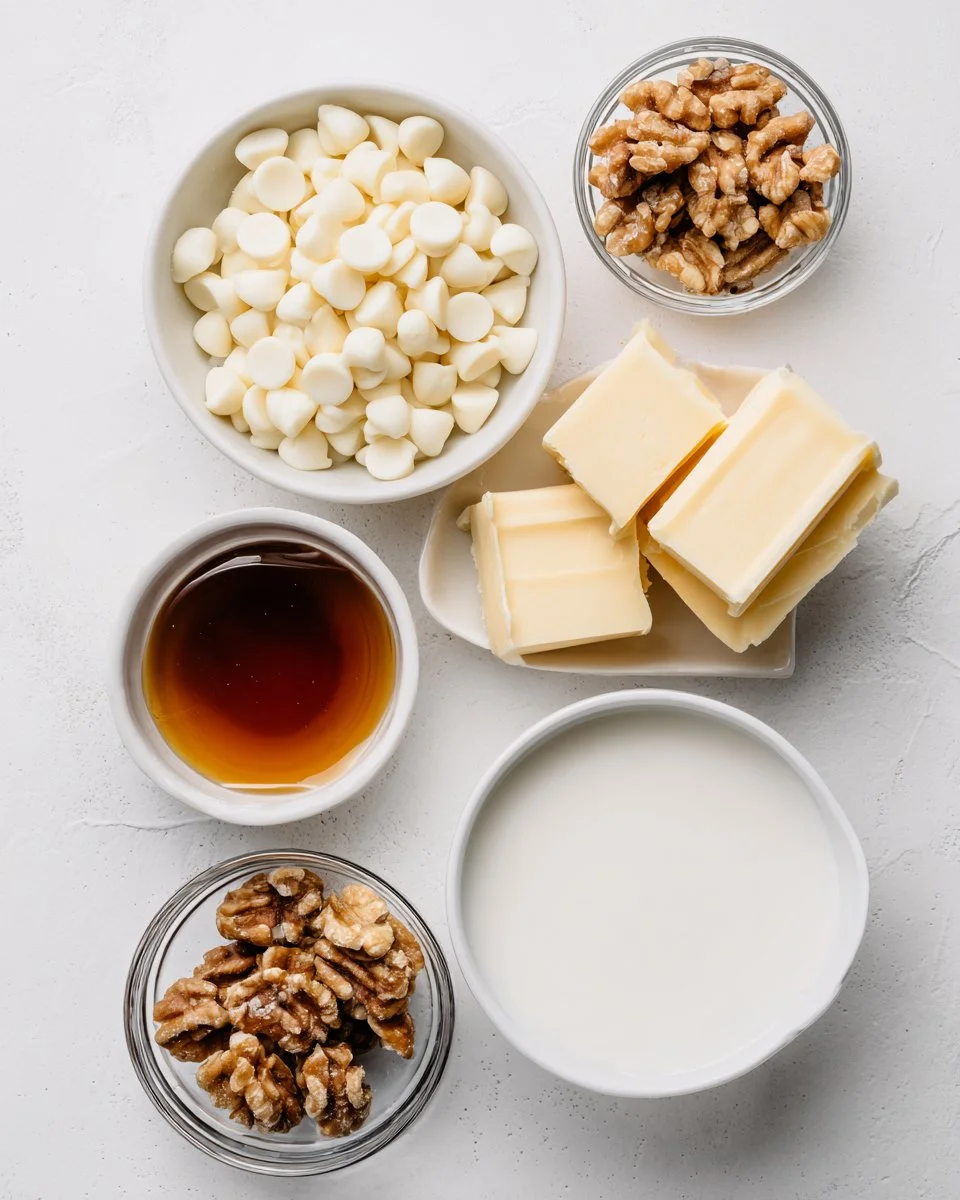
Ingredients Section
Here’s what you’ll need to whip up this delightful Maple Nut Fudge:
- 3 cups white chocolate chips: Use high-quality chips for the best flavor—Callebaut or Guittard are excellent choices.
- 1 (14-ounce) can sweetened condensed milk: Look for brands that don’t contain additives for a richer taste (Eagle Brand is a classic).
- ¼ cup real maple syrup: The real deal makes a world of difference. Don’t settle for imitation!
- 1 tablespoon butter: Ensure your butter is at room temperature for easy mixing. I often reach for Kerrygold for its rich flavor.
- 1 cup walnuts, chopped: You can substitute with pecans or even almonds if you prefer.
Step-by-Step Instructions
Prepare Your Pan: Line an 8×8-inch baking dish with parchment paper, leaving a 1–2 inch overhang on all sides for easy removal. This is crucial for preventing any sticky mess.
Combine Ingredients: In a medium-sized saucepan over medium heat, combine the white chocolate chips, sweetened condensed milk, maple syrup, and butter. Stir constantly to ensure it doesn’t burn. You want a smooth and thick mixture which should take about 8–10 minutes.
Add Walnuts: Once your mixture is wonderfully smooth, remove it from the heat and stir in the chopped walnuts until they’re evenly distributed throughout the fudge. This is where all that maple flavor melds beautifully with the chocolate and nuts!
Spread and Level: Pour the fudge mixture into your prepared baking dish, using a spatula to spread it evenly. Gently tap the dish on the counter to release any air bubbles trapped inside.
Chill: Cover the dish with plastic wrap and place it in the refrigerator for at least four hours, or until it’s fully firm. You’ll know it’s ready when it holds its shape.
Cut and Serve: Once the fudge has set, lift it out using the parchment paper. Cut into squares, and feel free to dust with a little extra chopped walnut or sea salt for added flair!
Expert Tips & Tricks
Be Patient with the Heat: It’s essential to cook the mixture over medium heat to prevent burning. Stirring constantly will yield a perfectly smooth and creamy fudge.
Chill Thoroughly: Don’t rush the chilling step; allowing it to set overnight gives the flavors time to meld beautifully.
Store Properly: Keep your fudge sealed in an airtight container at room temperature for about a week, or refrigerate for up to two weeks. It can also be frozen for longer storage—just thaw overnight in the fridge when you’re ready to indulge!
Avoid Common Mistakes: Be sure not to add walnuts before you’ve taken the mixture off the heat, or they may become too soft.
Perfect Presentation: When you cut your fudge, use a hot knife dipped in water to achieve smooth edges. It makes for a prettier presentation and elevates the treat.
Serving Suggestions
Maple Nut Fudge pairs beautifully with a steaming cup of coffee or a glass of fresh milk. For a lovely dessert platter, consider serving it alongside homemade brownies or a fruit tart. If you’re aiming for a rustic presentation, arrange the fudge pieces on a wooden board sprinkled with a few extra walnuts or a drizzle of caramel for that extra "wow" factor. This treat is ideal for gatherings, birthdays, or just indulging on a quiet evening at home.
Variations & Substitutions
Feeling adventurous? You can easily customize this fudge to suit your taste!
- Chocolate Variations: Swap half the white chocolate for dark chocolate for a more complex flavor.
- Flavor Additions: Add a pinch of sea salt or a splash of vanilla extract to enhance the flavor.
- Dietary Needs: For a dairy-free option, try using dairy-free chocolate chips and coconut cream in place of sweetened condensed milk.
Nutrition & Storage Info
- Prep time: 15 minutes
- Cook time: 10 minutes
- Total time: 4 hours and 20 minutes (includes chilling)
- Yield: About 16 servings (1×1 inch squares)
- Estimated calories per serving: 180 calories
- Storage Instructions: Store in an airtight container at room temperature for up to one week, or refrigerate for up to two weeks. It can also be frozen for up to three months.
FAQ Section
Can I use white chocolate bars instead of chips?
Yes! Just chop them finely for easier melting.Can I make this vegan?
Absolutely! Use coconut condensed milk and dairy-free chocolate chips.How do I make it nut-free?
Simply omit the walnuts, and consider adding crispy rice cereal for texture.Can I double the recipe?
Yes, just use a larger baking dish and adjust the chilling time if needed.What’s the best way to cut fudge?
Use a sharp knife and run it under hot water to get clean edges.Can I flavor the fudge differently?
Definitely! Adding peppermint extract or orange zest can create a fun twist.How can I make the fudge more chocolatey?
Mix in some cocoa powder or additional dark chocolate for a richer flavor.Why is my fudge grainy?
Graininess can occur if the chocolate overheats. Always melt gently.What should I do if my fudge won’t set?
Ensure you’ve allowed enough time in the fridge, or it may need more chocolate to thicken.Can I add dried fruit instead of nuts?
Yes! Cranberries or raisins make a great substitute for a chewy texture.
Conclusion
This Maple Nut Fudge: A Sweet, No-Fuss Treat for Any Occasion, is not just a dessert but a connection to memories, loved ones, and cherished moments. I encourage you to give it a try and savor the sweetness for yourself! Your taste buds will be thanking you, and your friends and family will surely want to know your secret. Please feel free to share your experiences in the comments; I love hearing from fellow baking enthusiasts! For more delicious recipes that warm the heart and satisfy the sweet tooth, explore related treats on my blog. Happy baking!

Maple Nut Fudge
Ingredients
Method
- Line an 8×8-inch baking dish with parchment paper, leaving a 1–2 inch overhang on all sides.
- In a medium-sized saucepan over medium heat, combine white chocolate chips, sweetened condensed milk, maple syrup, and butter. Stir constantly for about 8–10 minutes until smooth.
- Remove from heat and stir in the chopped walnuts until evenly distributed.
- Pour the fudge mixture into the prepared baking dish using a spatula to spread it evenly. Tap on the counter to release air bubbles.
- Cover with plastic wrap and refrigerate for at least four hours until firm.
- Lift out using the parchment paper and cut into squares. Optionally dust with extra chopped walnuts or sea salt.