no fuss pie crust has saved me more times than I can count, especially on those days when I really want pie but I do not want a floury kitchen and a workout with a rolling pin. You know the feeling, you promise yourself it will be easy, then the dough sticks, cracks, and suddenly you are irritated at a lump of butter. This crust is my calm, quick answer. It is simple, forgiving, and it bakes up tender with those little flaky bits that make you feel like you totally meant to do that. If you have ever avoided homemade crust because it feels fussy, this one is for you. 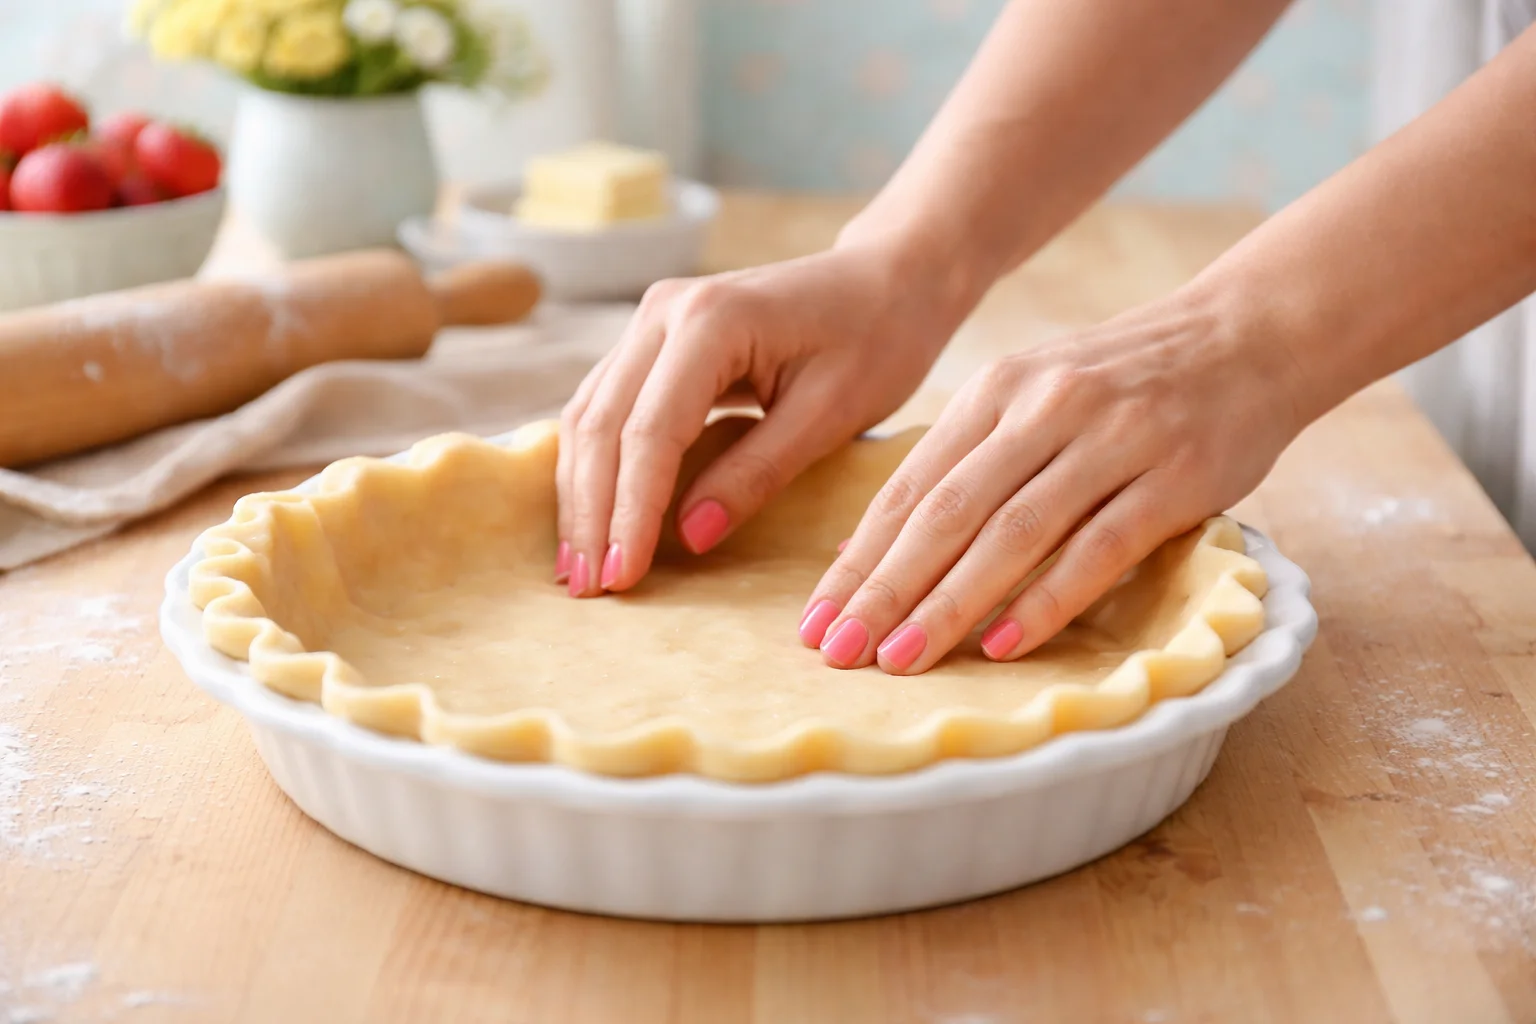
What is an Easy Simple Pie Crust Recipe?
An easy simple pie crust recipe is basically a crust that gives you the homemade taste without the usual stress. Instead of rolling dough out into a perfect circle, you mix it fast and press it right into the pan. That is why this style is sometimes called a press in crust or a no roll crust.
My favorite part is that you still get that real butter flavor and that sturdy bite that holds fillings well. You can use it for fruit pies, custard pies, quiche, and even savory pot pie style fillings. I make it when I need something reliable and I do not have time to babysit dough.
Here is the general idea of how it works. You mix cold fat with flour, add a little liquid, then press it into the dish with your fingers. No fancy techniques. No perfect edges required. And honestly, the slightly rustic look makes it feel extra homey.
One quick note from my own trial and error: this is not one of those crusts you want to overwork. The less you mess with it, the more tender it bakes up. If you can stop mixing the second it comes together, you are doing great.
Tools You Need for Easy Pie Crust
You do not need much to pull this off. I have made this crust in a rental kitchen with a dull butter knife and a random bowl. Still worked. But a few basic tools make it smoother, especially if you want to do it often.
My basic, no drama tool list
- 9 inch pie dish (glass or metal both work)
- Mixing bowl
- Measuring cups and spoons
- Fork or pastry cutter (a fork is totally fine)
- Small cup for ice water
- Clean hands for pressing the dough in
If you have a food processor, you can use it, but you really do not need it. I usually go old school with a fork because I like seeing the texture and stopping before it turns into paste.
Also, this is small but helpful: keep a dry towel nearby to wipe your hands. When your fingers get sticky, pressing the dough into the pan gets annoying fast. A quick wipe makes the whole thing feel easier.
“I tried this on a weeknight because I was craving apple pie and did not want a project. The crust pressed in so easily, and it held up beautifully. I am never going back to store bought.”
Key Ingredients of No Roll Pie Crust
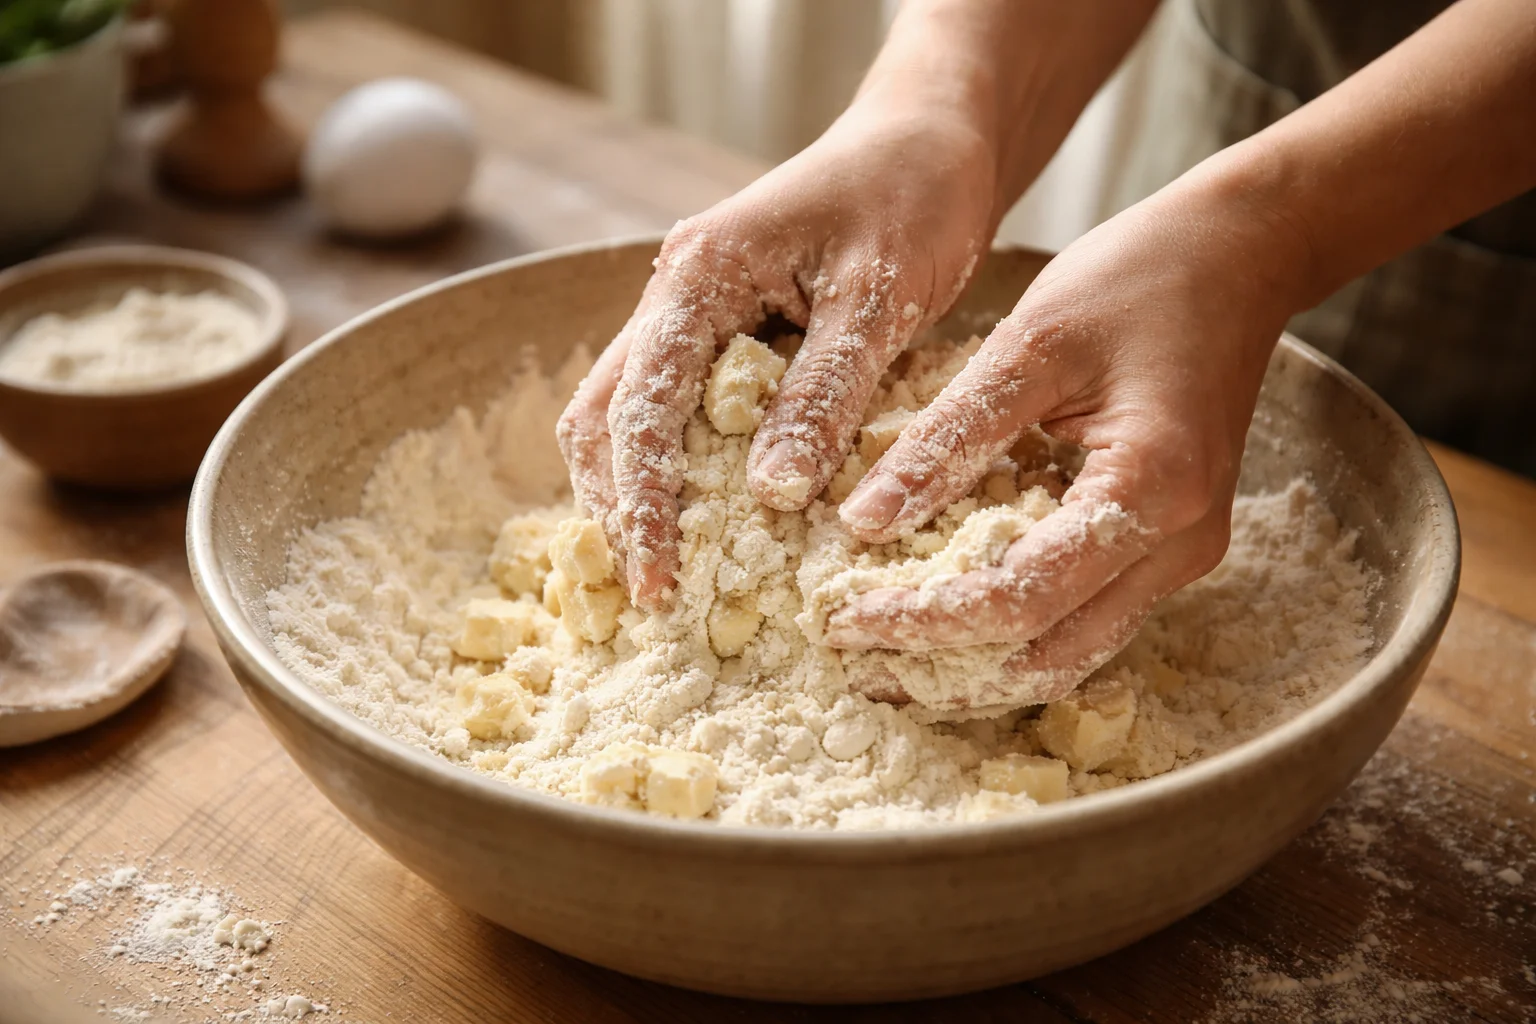
Let us talk ingredients, because this is where the magic happens. A no roll pie crust is all about simple pantry basics and one key thing: keeping your fat cold so you end up with a tender crust.
I am going to describe the version I make most often. You can tweak it a bit, but if you are new to crust, I suggest trying it as written once so you know how it is supposed to feel.
The core ingredients that make it work
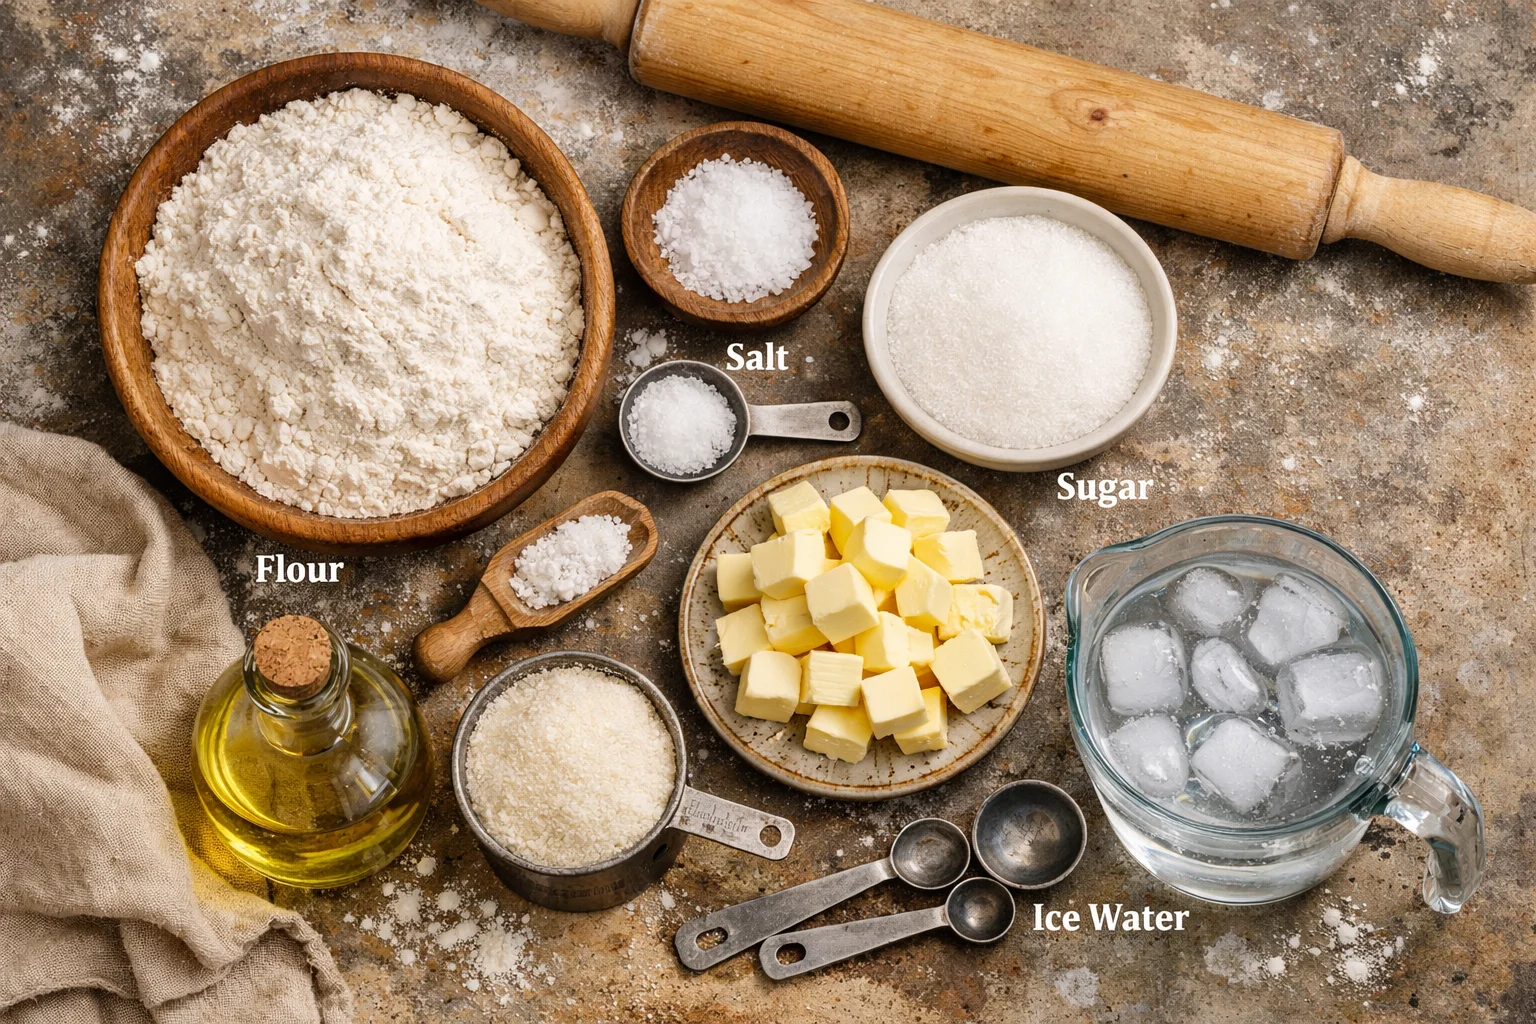
Flour is the structure. Regular all purpose flour is perfect here. If you scoop flour straight from the bag, you may pack in too much, so I like to spoon it into the measuring cup and level it off.
Salt is not optional in my house. It wakes up the flavor. Even for sweet pies, a little salt keeps the crust from tasting flat.
Sugar is optional but nice for sweet pies. It helps with a little browning and gives a gentle sweetness. If you are making a savory pie or quiche, you can skip it.
Butter is for flavor. I use unsalted butter most of the time. The trick is cold butter, cut into small cubes. When the butter melts in the oven, it leaves little pockets that make the crust tender.
Oil can be a helper ingredient. Some no roll crust versions use a bit of oil for extra tenderness and easy pressing. I sometimes do half butter and a little neutral oil when I want super easy handling.
Ice water brings it together. Add it slowly. You want the dough to look a little shaggy but hold when you pinch it.
If you are wondering about substitutions, here is my honest experience. Margarine works in a pinch, but the flavor is not as good. Shortening makes a very tender crust but tastes less rich. Butter is my favorite for a reason.
And if you are gluten sensitive, I have tried a one to one gluten free flour blend. It can work, but the dough is a bit more fragile, so press it gently and do not skimp on chill time.
Tips for Making the Easiest Pie Crust
This is the section I wish someone had handed me years ago, when I thought pie crust was some mysterious baking talent you either had or did not. It is not. It is just a few habits that make a big difference.
Little tips that keep it truly no fuss
Start cold and stay cold. If your kitchen is warm, pop the butter in the freezer for 10 minutes before you start. If the dough starts feeling soft, put the bowl in the fridge for a few minutes. Cold dough is easier to press and bakes up better.
Do not overmix. When you stir and stir, the dough gets tougher. Mix just until the flour looks moistened and the dough holds together when squeezed.
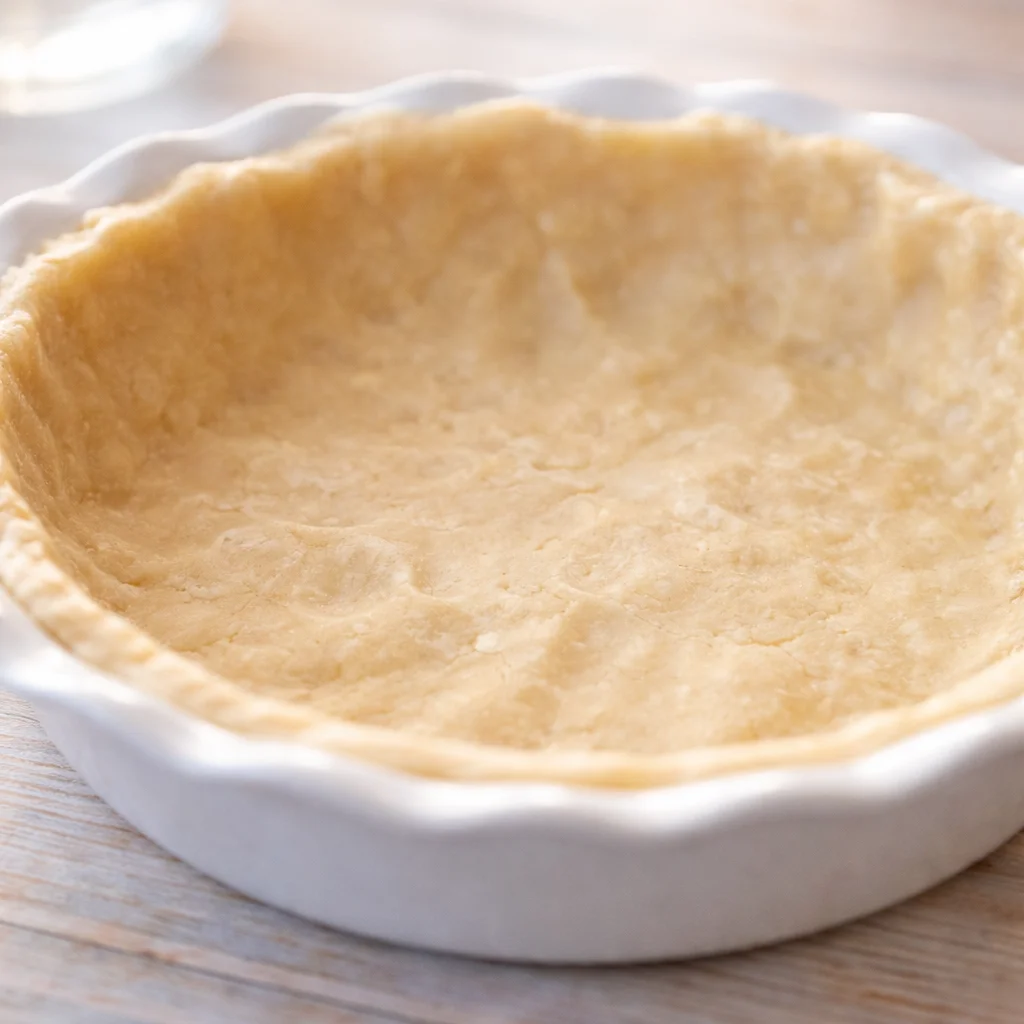
Press from the center outward. I start by pressing a thick disk on the bottom, then I push it outward and up the sides. If it looks thin on the edges, pinch in a little extra dough from the thicker spots.
Patch cracks like you mean it. If the dough cracks while pressing, just pinch it back together. This dough is friendly. You are not ruining it. Think of it like spackling a wall, just tastier.
Chill before baking. Even 15 to 20 minutes in the fridge helps the crust keep its shape. If you are blind baking for a custard pie, chilling is extra helpful.
For a crisp bottom, bake on a hot sheet. Preheat a baking sheet in the oven, then set your pie dish on it. That blast of heat helps the bottom cook through.
One more real life tip: set your pie dish on a towel while you press the dough in. It keeps the dish from sliding around, and you will feel a lot more in control.
Make Ahead and Storage Instructions
This is where homemade crust becomes actually doable in real life. When I have a busy week coming, I make the dough ahead so pie can happen without the whole production.
You have a few options, depending on what you need.
How to make it ahead without losing quality
Make the dough and chill it: Mix the dough, form it into a disk, wrap it well, and refrigerate up to 2 days. When you are ready, let it sit on the counter for about 5 to 10 minutes so it is easier to press into the dish.
Press it into the pan ahead of time: This is my favorite. Press the crust into the pie dish, cover it tightly, and refrigerate for up to 24 hours. When you are ready to bake, you can fill it and bake as usual.
Freeze it: You can freeze the dough disk for up to 3 months. Wrap it in plastic wrap, then put it in a freezer bag. Thaw overnight in the fridge. You can also freeze the crust already pressed into the pan. Just wrap it very well so it does not pick up freezer smells.
After baking: If you blind bake the crust, let it cool completely, then wrap and store at room temp for a day or two. For longer storage, freeze the baked crust and thaw at room temp before filling.
If you ever pull a crust from the freezer and see a little frost, do not panic. Just let it thaw in the fridge and dab any moisture with a paper towel before you fill it.
Common Questions
1) Can I use this crust for savory pies like quiche?
Yes. Just skip the sugar and add a tiny extra pinch of salt if you want. This no fuss pie crust holds up really well to eggs and cheese.
2) Do I have to blind bake it?
Not always. For fruit pies that bake a long time, you can usually fill and bake. For custard pies or anything with a wet filling, blind baking helps prevent a soggy bottom.
3) Why is my crust tough?
Most of the time it is from overmixing or adding too much water. Next time, mix less and add water slowly. A gentle hand makes a big difference.
4) What if I do not have butter, can I use oil only?
You can, but the flavor will be different and the texture is more crumbly. If you go oil only, chill the crust well before baking so it sets up nicely.
5) How do I keep the edges from browning too fast?
If the edges start getting too dark, loosely cover the rim with foil. I usually check around the halfway point of baking.
A sweet, simple ending and a little push to try it
If pie has felt like too much work, I hope you try this no fuss pie crust and see how doable it can be. Once you make it a couple times, it becomes one of those recipes you can do without thinking, the kind that makes you feel weirdly proud when you pull a golden pie from the oven. If you want another take on this style, this No Fuss Pie Crust – No Rolling Pin Needed – 12 Tomatoes version is a fun read, and this Simple Pie Crust Recipe (No Roll, 5 minutes!) is great when you want to compare methods. Make it once, keep the ingredients on hand, and you will have a no fuss pie crust ready for everything from weekend apple pie to a quick weeknight quiche. 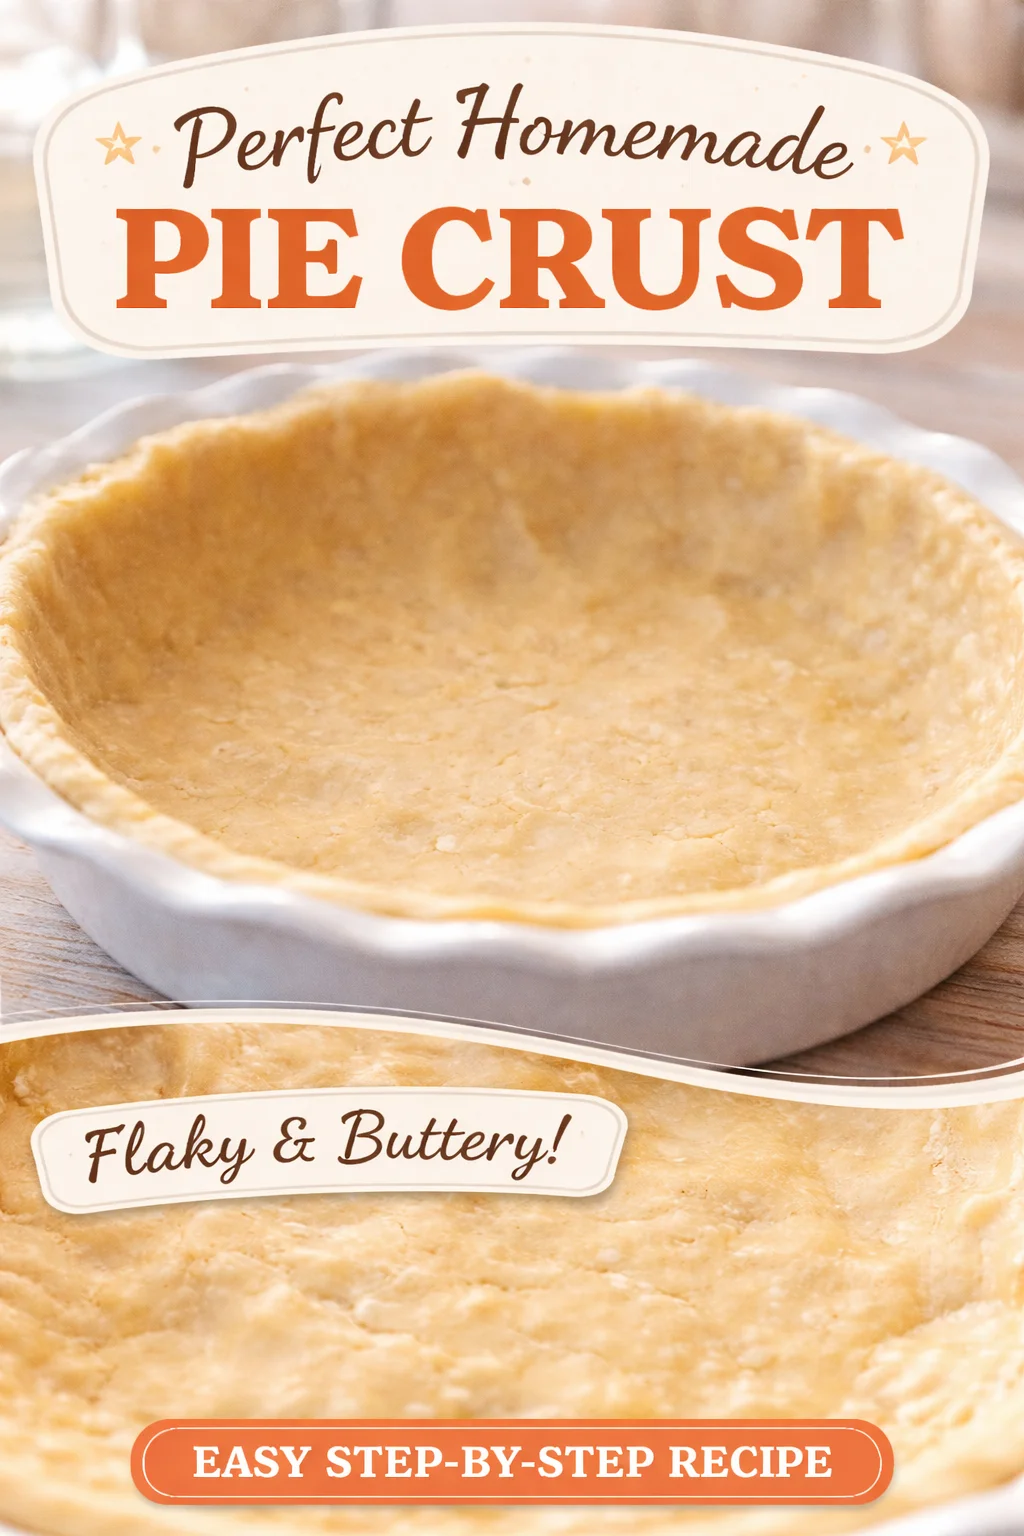
No Roll Pie Crust
Ingredients
Method
- In a mixing bowl, combine flour, salt, and sugar (if using).
- Add cold, cubed butter and mix until mixture resembles coarse crumbs.
- Gradually add ice water, 1 tablespoon at a time, mixing until the dough holds together without being sticky.
- Form the dough into a disk, wrap in plastic wrap, and refrigerate for at least 15 minutes.
- Press the dough directly into a pie dish, ensuring even coverage across the bottom and sides.